Monday, September 30, 2013

Fluent MVC Extensions in Class Hierarchy


In my previous blog I showed on how to create fluent MVC extensions. In that blog I created a Label extension with two extension methods Text and Target. Both these extension methods are chained together using the fluent design pattern. This kind of fluent design pattern works well if we creating some small or standalone controls.

When we are creating an extension library which contains complex controls like that of Juime. We need to define a rich set of base class libraries which provide common functionality across all controls. Some of these base class functionalities can be CssClass, HtmlAttributes. If you look at the ASP.NET Web Form controls you can notice this base class hierarchy. In this blog I will show you how to create a base class hierarchy that participates in the fluent design pattern.

From my previous blog here is the code for defining a Label extension.

    public static class LabelExtensions
    {
        public static Label FluentLabel(this HtmlHelper helper)
        {
            return new Label();
        }
    }


    public class Label, IHtmlString
    {
        private string target, text;

        public Label Target(string target)
        {
            this.target = target;
            return this;
        }

        public Label Text(string text)
        {
            this.text = text;
            return this;
        }

        public override string ToString()
        {
            return ToHtmlString();
        }

        public string ToHtmlString()
        {
            return String.Format("<label for='{0}'>{1}</label>Fluent", target, text); ;
        }
    }

Here is how the above Label extension is consumed in the View.

@(Html.FluentLabel()
        .Target("firstName")
        .Text("First Name")
             )

Our goal is split the Label into a parent and child class without impacting how the extension is consumed in the View.

For this I define a base class for Label called Control. Into this control, I will move the Text method. Here is my code (which is not the final code)

    public class Label : Control, IHtmlString
    {
        protected string target;

        public Label Target(string target)
        {
            this.target = target;
            return this;
        }

        public Label Text(string text)
        {
            this.text = text;
            return this;
        }

        public override string ToString()
        {
            return ToHtmlString();
        }

        public string ToHtmlString()
        {
            return String.Format("<label for='{0}'>{1}</label>Fluent", target, text); ;
        }
    }

    public class Control
    {
        protected string text;

        public Control Text(string text)
        {
            this.text = text;
            return this;
        }
    }

The problem with this code is the Text method, it is returning the base class Control. In order to participate properly with the Label extension, the base class Control should return the Label datatype (derived class) from the Text method.

As Control is the base class, it will not have any idea of the derived classes. The only way Control knows about its child objects is that when they are passed to the Control class as inputs. As you know we can pass the class type as input by using generics. Hence the Control base class should be a generic class which takes the derived type as generic input and this passed in derived class is returned as the function output of the Text method. Here is the final code of the base class with generic derived input parameter.

    public class Control<T> where T : Control<T>
    {
        protected string text;

        public T Text(string text)
        {
            this.text = text;
            return (T) this;
        }
    }

Here is how the Label class is derived from the Control class

    public class Label : Control<Label>, IHtmlString

In the above code Label type is passed as the input to the Control class and this generic type is returned as the return type for the Text method. Also note that the where clause in the Control class definition is needed for type casting this to the derived class.
This generic trick will make our base class return the derived class type, Label, thereby allowing us to use fluent design pattern in control hierarchy. Here is the final code.

    public static class LabelExtensions
    {
        public static Label FluentLabel(this HtmlHelper helper)
        {
            return new Label();
        }
    }


    public class Label : Control<Label>, IHtmlString
    {
        protected string target;

        public Label Target(string target)
        {
            this.target = target;
            return this;
        }


        public override string ToString()
        {
            return ToHtmlString();
        }

         public string ToHtmlString()
        {
            return String.Format("<label for='{0}'>{1}</label>Fluent", target, text); ;
        }
    }


    public class Control<T> where T : Control<T>
    {
        protected string text;

        public T Text(string text)
        {
            this.text = text;
            return (T) this;
        }
    }

As you see we were able to extend the fluent design to the class hierarchy without impacting how the control is used in the View.
Monday, September 23, 2013

MVC Extension Library

If we are building a library of MVC extensions it would be nice to define a name to this library and organize all the extensions within that library. For example we are building a library, called Juime, which contains MVC extensions for the JQuery UI controls. We are grouping all these controls under Juime, so that user can easily access them. Below is how a user can call the Accordion control in our Juime library:

@Html.Juime().Accordion()
@Html.Juime().Tabs()
@Html.Juime().DatePicker()


This kind of grouping not only simplifies user access but also improves the branding. In this article I will walk through on how to achieve this kind of grouping.

As we are building a library, from an MVC perspective there will be only one extension, called Juime. All other controls are part of this extension. All of our controls needs to be created from this extension. In order to achieve this, I am using a factory pattern which creates all of our JQuery UI controls and this factory object will be returned from our Juime extension method. Here is the code of the Juime extension which creates and returns the factory:

    public static class JuimeExtension
    {
        public static ControlFactory Juime(this HtmlHelper helper)
        {
            return new ControlFactory(helper);
        }
    }

In the above code ControlFactory creates all the JQuery UI controls. Here is the code of the Control Factory

    public class ControlFactory
    {
        HtmlHelper helper;

        public ControlFactory(HtmlHelper helper)
        {
            this.helper = helper;
        }

        public AccordionBuilder Accordion()
        {
            return new AccordionBuilder();
        }


        public TabsBuilder Tabs()
        {
            return new TabsBuilder();
        }

    }

By using Factory pattern and extension method framework, I was able to group all our controls under our product name called Juime.

Wednesday, September 18, 2013

Fluent MVC Extensions

In my previous blog I provided an overview of the MVC Extensions (HTML Helpers) and creating a custom extension. If you haven’t look at my previous blog, I recommend going through that blog.

In this blog I will show how to create a custom MVC Extensions using the Fluent Interface, which is the gateway for creating complex HTML Helpers.
Fluent API

The elegant way to create a complex HTML Extensions is to use the Fluent API approach. Below is the quote from Wikipedia on the Fluent Interface

In software engineering, a fluent interface (as first coined by Eric Evans and Martin Fowler) is an implementation of an object oriented API that aims to provide for more readable code.

A fluent interface is normally implemented by using method chaining to relay the instruction context of a subsequent call (but a fluent interface entails more than just method chaining [1]). Generally, the context is
                ·         defined through the return value of a called method
                 ·         self-referential, where the new context is equivalent to the last context
                 ·         terminated through the return of a void context.

The key to the fluent interface is method chaining. The fluent interface was heavily used in the .NET framework. Below is an example of using the fluent interface

IEnumerable<string> query = translations
                                                .Where   (t => t.Key.Contains ("a"))
                                                .OrderBy (t => t.Value.Length)
                                                .Select  (t => t.Value.ToUpper());

 As you see all the methods (Where, OrderBy, Select) are chained together thus providing a seamless interface to the developers. There is no limitation on the number of methods you can chain.

We can incorporate this fluent interface in our custom Label HTML Extension. With the fluent interface our call to the label will be transformed as follows:

@(Html.FluentLabel()
               .Target("firstName")
               .Text("First Name")
              )

 With the fluent interface the properties will be transposed to the methods and these methods will be chained together.

Method Chaining Pattern

Method Chaining is a technique in which every method returns the current object, which it is part of, thus allowing the calls to be chained together in a single statement. In our custom extension Target and Text methods are stacked on another and if needed we can continue this cascading to any number of methods. Below is the Target method’s code which demonstrates this method chaining pattern.

        public Label Target(string target)
        {
            this.target = target;
            return this;
        }

 As you see in the above code, at the end the method returns the current object, which is Label object.

Fluent API in Action

Below is the complete code of our custom Label HTML Helper using fluent interface with methods Target and Text chaining together to form a cohesively unit

    public static class LabelExtensions
    {
        public static Label FluentLabel(this HtmlHelper helper)
        {
            return new Label();
        }
    }

    public class Label
    {
        private string target, text;

        public Label Target(string target)
        {
            this.target = target;
            return this;
        }

        public Label Text(string text)
        {
            this.text = text;
            return this;
        }

        public override string ToString()
        {
            return String.Format("<label for='{0}'>{1}</label>Fluent", target, text); ;
        }
    }

This above custom Label extension can be used in the View as follows:

@(Html.FluentLabel()
        .Target("firstName")
        .Text("First Name")
            )

As you see the Fluent interface provides an easy infrastructure for building complex MVC Extensions.
If we are building a library of MVC Extensions, such as Juime (JQuery UI MVC Extensions), we need more than fluent interface. We have to couple this fluent interface with builder pattern. In my next blog I will walk you through the builder pattern and how it can be applied to build MVC Extensions.

Friday, September 13, 2013

ASP.NET MVC Extensions


MVC Extensions (Helpers) abstracts HTML code from the developers so that they can focus on the UI layout. It helps developers by providing an easy way to render HTML and from tedious work of writing HTML tags. It also reduces code duplication. Further it provides traditional ASP.NET Web Form controls’ look and feel, thereby making Web Form developers feel home and allowing them an easy transition for the Web Form developers into MVC developers.
In this blog I will give a brief introduction of the MVC Extensions and how to create a custom Extension. In my next blog I will show an elegant way of creating a custom Extensions using which a complex HTML Helper can be efficiently created and seamlessly integrated.

Framework Extensions
ASP.NET MVC framework provides several helper methods to facilitate easy rendering of form elements. The below list shows the HTML helpers provided by the framework:
  • ActionLink — Links to an action method.
  • BeginForm — Marks the start of a form and links to the action method that renders the form.
  • CheckBox — Renders a check box.
  • DropDownList — Renders a drop-down list.
  • Hidden — Embeds information in the form that is not rendered for the user to see.
  • ListBox — Renders a list box.
  • Password — Renders a text box for entering a password.
  • RadioButton — Renders a radio button.
  • TextArea — Renders a text area (multi-line text box).
  • TextBox — Renders a text box.
Refer to the below msdn link for more information on the available helpers and details on how to use the frequent MVC helpers


Custom Extensions
An HTML Helper is an extension method that returns a string. The framework provides necessary infrastructure to create custom helpers in an effortless way. The below link demonstrates on how to create a custom HTML Helper.

http://www.asp.net/mvc/tutorials/older-versions/views/creating-custom-html-helpers-cs

The above link shows an example of creating a simple Label Helper. Below is the code extracted from there:

using System;
using System.Web.Mvc;
 
namespace MvcApplication1.Helpers
{
  public static class LabelExtensions
  {
    public static string Label(this HtmlHelper helper, string target, string txt)
    {
      return String.Format("<label for='{0}'>{1}</label>", target, txt);
    }
  }
}
This Label extension is used in the View as follows:
       @Html.Label("firstName", "First Name:")


As you see the Label Extension takes all the necessary parameters as function inputs. The parameter injection is good way if you have limited number of parameters. This approach will quickly become ugly if you have many parameters with some optional parameters. If you are building a complex HTML Extensions this is clearly not the way to go.

In my next blog I will show how to create complex HTML Helpers using the Fluent interface which would not only reduces the complexity but also increases code readability.

Tuesday, September 3, 2013

Elegant C# Asynchrony

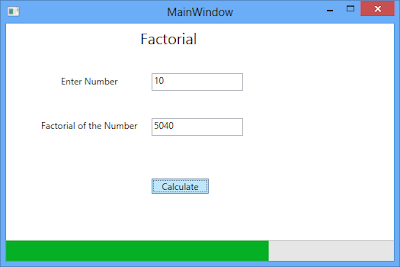
As you know Async is the highly talked and hyped feature of .NET 4.5. With the growing demand for a responsive app all applications need to respond to user interactions and asynchronously process in the background. With this feature Microsoft made the asynchronous programming so simple. In this blog I will show you how to do an asynchronous programming the traditional way and how Microsoft made it so simple. Let’s start of with a small application which calculate the factorial of the given number. In this let’s assume that the calculation (multiplication) take a while and see how we can delegate this to a background process and maintain a responsive user interface by using async and await. I quickly put in a UI screen which calculates the Factorial for the given number and shows the progress while calculating.


Here is the code for calculating the Factorial:
public void Calculate()
{
   int number = Convert.ToInt32(InputTextBox.Text);
   progressBar.Minimum = 1;
   progressBar.Maximum = number;

   long result = 1;
   for (int counter = 1; counter <= number; counter++)
   {
      result = Multiply(result, counter);
      progressBar.Value = counter;
      ResultTextBox.Text = result.ToString();
   }
}

private long Multiply(long x, long y)
{
   Task.Delay(1000).Wait();
   return x * y;
}
As you see in the above code Multiply function takes a while to calculate (I introduced a delay to simulate long processing). Also note that the long running process is inside a loop and needs to be executed sequentially. In other words when I am running the multiply function in background, my UI thread needs to wait for the backend thread to complete. This is needed as I am showing progress for each operation of the backend thread. Instead of going directly to the async and await, I want to show how this can be in the traditional way using Task. As our application needs to execute sequentially by providing a responsive UI we need to substantially rewrite our code. Further we need to ensure that the UI is updated from the main thread and not from background thread. Here is the code using the traditional Task based asynchronous pattern:
public void CalculateTask()
{
   int number = Convert.ToInt32(InputTextBox.Text);
   progressBar.Minimum = 1;
   progressBar.Maximum = number;

   long result = 1;
   Task<long> t = new Task<long>(() => MultiplyTask(result, counter));
   t.Start();
   t.ContinueWith(ContinueTask);
}

private long MultiplyTask(long x, long y)
{
   Task.Delay(1000).Wait();
   return x * y;
}

private void ContinueTask(Task<long> t)
{
   long result = t.Result;
   Dispatcher.BeginInvoke(new Action(delegate
   {
      progressBar.Value = counter;
      ResultTextBox.Text = result.ToString();
   }));

   if (counter <= 10)
   {
      counter++;
      t = new Task<long>(() => MultiplyTask(result, counter));
      t.Start();
      t.ContinueWith(ContinueTask);
   }
}
As you see we need to take care of several things to provide a responsive UI and keeping the same functionality. This coding becomes complex and need a thorough thought. With the asynchrony, Microsoft simplified this design. They made it so natural that the traditional sequential program pattern be used and still do the asynchronous programming. They removed all the complexity of asynchronous programming and gave a simple design. The C# compiler was made smart and was told how to rewrite the code to make synchronous code asynchronous and still maintain the synchronous behavior and thereby providing a better user experience. Here is the initial code tweaked to utilize the async & await features of C#:
public async void CalculateAsync()
{
   int number = Convert.ToInt32(InputTextBox.Text);
   progressBar.Minimum = 1;
   progressBar.Maximum = number;

   long result = 1;
   for (int counter = 1; counter <= number; counter++)
   {
      result = await MultiplyAsync(result, counter);
      progressBar.Value = counter;
      ResultTextBox.Text = result.ToString();
   }
}

private async Task<long> MultiplyAsync(long x, long y)
{
   await Task.Delay(1000);
   return x * y;
}
If you see the code is pretty much same. Only Async and Await are added. With async and await any one can easily write an asynchronous program. It was made so simple that I feel this can be misused. Here is the source code which demonstrates all the three approaches I mentioned above.

Download Source Code